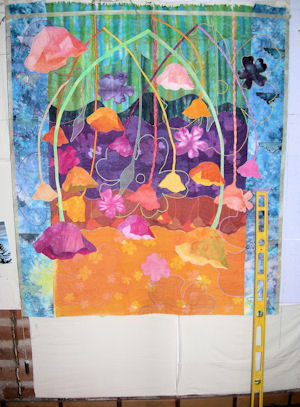
The level is on the right, and you can barely see the plumb line on the lower left corner; these are the most important tools in straightening up a large piece of fabric art. There isn’t exactly a T-Square that will work. For the first time I used masking tape to create a straight line after I’d measured carefully, and that turned out to be a helpful cutting guide rather than just drawing a line on the fabric.
I made a temporary hanging sleeve last night and hung up the piece, unfinished, to see how straight it looks; I was surprised at how relatively good it looks. I wanted to get an idea of how straight it was before sewing on the binding…..and then hanging it up….and then taking off the binding to straighten it up…..what a nightmare that is!
Bear in mind this is an old house, where there really are no reliable 90-degree angles, and that there’s some distortion in the photo:
I wanted to use this very cool fabric I dyed for the binding….
…but I don’t have enough! I went to a local fabric store and bought a yard of dark fabric for the binding. Which I plan on sewing on today….so stay tuned! I can’t believe this is almost finished.


It’s beautiful, Clare!!!
Thanks. Almost done.
Really tragic news this a.m. re: Representative Giffords. I’m stunned.