Project Projection

This is how it starts when it comes to making shadow shapes: the overhead projector gets dragged into the living room. This is the biggest shadow shape I’m using, here it’s projected on some Pellon True Grid taped to the wall. I outlined it with a sharpie, cut it out, and pinned it on top of a large piece of shiny nylon tulle. I put stabilizer on the back of the quilt top; here I am feeding the shape through my machine and sewing the outline:

Pinning everything together and laying it out requires my large braided rug to be used as a work surface:

The next step: dyeing yarn for the outlines for the shapes. I’m using bright colors to liven things up; the piece is a bit gray so far.  The largest shape requires 20 feet of yarn. I’ll dye small amounts of fabric or yarn in my kitchen sink:

The first completed shape is orange and it’s on the left side: it’s meant to be subtle.

I’m sewing down the second outline now….updates soon.

New Piece!

I finished the most recent piece I was working on; I wanted it done so I could photograph it and submit it to the member show at the Tubac Center for the Arts this December.

Last time I posted, I’d straightened up the quilted desert marigold piece. This past week, I picked up where I left off.

I used a zig-zag stitch to attach 4 strips of quilt batting to each side of the marigold center, making a large rectangle; I then put a piece of yellow fabric on the bottom for the backing, and I cut matching strips of the fabric I dyed last week on top of the strips of newly attached batting. Here you can see the quilt sandwich in process, I’ve just started laying down the pressed strips of fabric on top:

Once I attached a strip, I machine quilted it with an abstract stipple pattern; I guess this is the “quilt as you go” part of the process:

Then I cut 4 strips of green fabric from my hand dyed “stash” of fabric, the green strips bring out the green flower stems; I carefully measured and placed each strip over the areas where the raw edges of the fabric were exposed. Then, I straightened up all 4 sides:

Finally, the last step is the binding. There is apparently some sort of quilt sprite or elf at work in my studio space, because out of nowhere I found a pre-assembled binding strip, abandoned from a prior project. Finding this saved me a bit of time! I’ve always liked a black binding with faint polka-dots. I think it’s my universal binding and I tend to use that fabric often for bindings. I just had to press the binding strip I found (it was perfectly long enough) and then draw a 1/2 seam allowance line along the length of the strip to keep me on track as I sewed it down:

Here is the almost-finished piece: not the best photo, as you can’t see the entire binding, but it is straight and hangs nicely: all I have left to do is whip-stitch the binding to the back of the quilt. This was good enough to photograph and submit to the Tubac show.

I would’ve probably gotten more done this week, but Thursday night I made 15 pounds of German potato salad for a big family reunion this weekend in St. David, Arizona; my mother’s 9 siblings and some of their families are in town for a memorial service for my maternal grandmother, who died earlier this summer. Luckily I have a big enough fridge to accommodate all 15 pounds. I also roasted a turkey breast (sadly, I could only afford a commercial factory bird) and made cranberry sauce.

Now it’s time to put it all in a cooler and get ready for a long weekend with family!

Quilt-As-You-Go Part 2

Well, I finished last week’s quilt-as-you-go sample and it turned out really good. I was inspired: finally, I’ve found a solution to a problem that’s been dogging me a while. I started straightening up my quilt piece:

Here it is, nice and even:

I needed some fabric that would make a good border, so I made up a new batch of dye concentrates, I think I mix up the same 7–8 most of the time:

And out to my wet studio I go…..ha ha ha:

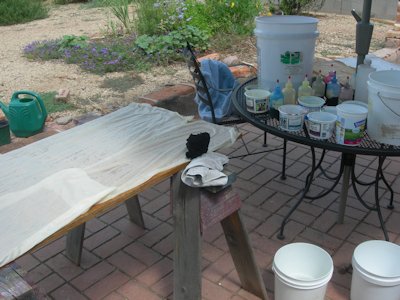
I sponged on layers of dye; the fabric was soaked in soda ash water first, then wrung out. The initial dye application was blurry, but as the fabric dried (remember, it’s very dry and hot here) the sponge marks became more distinct. This is what the fabric looked like mid-way through the process:

Here’s the fabric as it rests for a few hours to let the dye work it’s way into the fabric even more:

I also dyed some black and white fabric for the binding. This fabric turned out really interesting, it looks almost skeletal: this is just one piece of fabric scrunched and dyed in black dye:

I attached strips of batting to my quilted piece, then made my quilt sandwich with fabric on the back, batting, and now strips of my newly dyed fabric; here’s how it looked as I was assembling it:

And here it is now that I’ve machine quilted 3 sides of it:

One more piece to go, then I’ll attach the strips and voila, I think I’ll have found the perfect setting for my desert marigolds.

A Foray Into Quilt-As-You-Go

Above, two unfinished projects made of laminated silk fabric. Well, the one on the right I technically “finished”, I just don’t like it. Both are quilted, but neither one has a decent border; I think I didn’t know how to treat the fabric once I’d finished it, and thought perhaps it needed a setting more…exalted…than “just” a quilted border. I thought maybe a wooden frame. I believe I’ve posted about my attempts to use a miter saw to this end. Not pretty.

Now I’ve changed my mind about needing a wooden picture frame, and not just because woodworking is so bleeping difficult. I’m feeling more inclined to remain committed to fabric art….and that means all fabric. No frames. Of course, this perspective has a pragmatic component: I need a few pieces to submit to shows, and the pieces all have to be art quilts. I’d like to submit a piece for this December’s Member’s Exhibit at the lovely Tubac Center for the Arts, just 45 minutes south of Tucson. I’d also like to submit 4 pieces for consideration for a new SAQA (Studio Art Quilters Association) competition, and the deadline is November. And of course I’m working hard to get my January 8 Shooting related piece ready to submit to the Tucson quilt show in just 4 months. I’ve created 3 deadlines for myself.

I’ve been reading about quilt-as-you-go; there are many ways to construct a quilt by assembling quilted fabric piece-by-piece. Too many to mention here. I’ve just kind of put something together. I’m making a sample now to see how it looks, and if I like the result I’ll use it to fix the pieces shown above.
Here is a small 12″ x 12″ block. It’s an unfinished bit of thread-painting I did in a workshop many years ago with Libby Lehman, this is one of her patterns; here I am quilting it:

Now I have a small quilted block with no border, just a lonely block looking for a perfect setting. I cut four strips of batting, each 5 inches wide, to fit around the block, and zig-zag stitched the batting strips to the quilt block:

Here are 4 strips of lavender fabric on top of the batting; looks like a nice harmonious match:

Now I’m quilting each strip onto the batting:

Tomorrow I’ll show you the next steps I’ll take to finish my quilt-as-you-go sample, and then I’ll know if I think it’ll work as a technique for my laminated fabric pieces.

Finished Quilt Top

Here’s what I’ve got now; this is my “quilt top”. This will be roughly the finished size, which is 66″x92″ now. I’ll be adding more appliques and sheer fabric shapes. And the 6 windows. 6 is not an easy design number; 5 and 7 are so much better! But that number drives the design, for better or worse. Perhaps a bad design number will encourage me to come up with the best design possible, given the limitations. We’ll see!

Straightening Up

Today I started straightening up my art quilt-top. This is a tedious process involving ironing the piece, and then using a level and plumb line (you can see the plum on the lower left side of the photo below). Once I have a somewhat true vertical, I’ll then pin the vertical fabric on top and sew a seam, and hopefully when it comes time to straighten up the final quilted product, the vertical seam and the binding will mostly appear parallel. Wish me luck.

Screen Printing Saguaros

I need some fabric for the border of my quilt; I spent the weekend screen printing, and while I wanted the fabric dark, I started out light with a dark pink. Above, the first run of saguaros. Below, two silk screens with saguaros cut out of contact paper stuck; the screens are the same size, but the arrangement of the saguaros is different on each one.

I then did a run of blue, then gray over the pink:

This is how the fabric looked after the first run of gray, it’s the vertical piece on the right:

I thought it wasn’t dark enough, and printed another run of saguaros with what I thought was a darker gray, but it didn’t make too much difference; here’s both vertical pieces auditioning on either side of the quilt top, along with some fabric strips auditioning for window frames for the 6 windows:

I think I’m OK with the vertical border fabric as it is. Which is another way of saying I’m done screen printing out in the heat on my patio. The next step is to put it all together, and then I have to decide what colors to use to frame the windows; here’s a few strips I’m trying out. My sister had the great idea to alternate the colors and widths of the fabric strips for the windows.

Lots to do. More soon, when I can tear myself away from obsessive/compulsive fabric auditioning and sewing. It seems I just can’t stop trying out yet more colors and patterns to see what will work best. This is where having lots of fabric may be my doom.

Quilt Progress So Far

I took a photo today of my art quilt as it is now; you can see the 4 foot level on the right hand side, for some scale: this piece will be large.

I feel this piece would benefit from some really dark tones to make all the light bits “pop” out a bit; so I have this plan to have dark fabric as a vertical border on either side of the piece, and the same fabric will be the vertical pieces for the window frames for the 6 windows. This will tie everything together. With that in mind, I cut out some contact paper shapes and stuck them on some silk screens, so I could print fabric with these saguaro designs:

The fabric will ultimately be very dark, but it’s going to start out light as I add layers; here’s the fabric drying on my patio, it was sunset and there are–sadly–mosquitoes in Tucson now. I took the photo through my screen door. The clouds at the time didn’t seem very significant.

A big thunderstorm blew threw an hour later; this is the edge of the storm, a nice big creamsicle colored cloud:

More dyeing in a few days. I’m out of print mix so have to make up more before I can finsih the screen printing.