A Foray Into Quilt-As-You-Go

Above, two unfinished projects made of laminated silk fabric. Well, the one on the right I technically “finished”, I just don’t like it. Both are quilted, but neither one has a decent border; I think I didn’t know how to treat the fabric once I’d finished it, and thought perhaps it needed a setting more…exalted…than “just” a quilted border. I thought maybe a wooden frame. I believe I’ve posted about my attempts to use a miter saw to this end. Not pretty.

Now I’ve changed my mind about needing a wooden picture frame, and not just because woodworking is so bleeping difficult. I’m feeling more inclined to remain committed to fabric art….and that means all fabric. No frames. Of course, this perspective has a pragmatic component: I need a few pieces to submit to shows, and the pieces all have to be art quilts. I’d like to submit a piece for this December’s Member’s Exhibit at the lovely Tubac Center for the Arts, just 45 minutes south of Tucson. I’d also like to submit 4 pieces for consideration for a new SAQA (Studio Art Quilters Association) competition, and the deadline is November. And of course I’m working hard to get my January 8 Shooting related piece ready to submit to the Tucson quilt show in just 4 months. I’ve created 3 deadlines for myself.

I’ve been reading about quilt-as-you-go; there are many ways to construct a quilt by assembling quilted fabric piece-by-piece. Too many to mention here. I’ve just kind of put something together. I’m making a sample now to see how it looks, and if I like the result I’ll use it to fix the pieces shown above.
Here is a small 12″ x 12″ block. It’s an unfinished bit of thread-painting I did in a workshop many years ago with Libby Lehman, this is one of her patterns; here I am quilting it:

Now I have a small quilted block with no border, just a lonely block looking for a perfect setting. I cut four strips of batting, each 5 inches wide, to fit around the block, and zig-zag stitched the batting strips to the quilt block:

Here are 4 strips of lavender fabric on top of the batting; looks like a nice harmonious match:

Now I’m quilting each strip onto the batting:

Tomorrow I’ll show you the next steps I’ll take to finish my quilt-as-you-go sample, and then I’ll know if I think it’ll work as a technique for my laminated fabric pieces.

Finished Quilt Top

Here’s what I’ve got now; this is my “quilt top”. This will be roughly the finished size, which is 66″x92″ now. I’ll be adding more appliques and sheer fabric shapes. And the 6 windows. 6 is not an easy design number; 5 and 7 are so much better! But that number drives the design, for better or worse. Perhaps a bad design number will encourage me to come up with the best design possible, given the limitations. We’ll see!

Latest Sock Master Plan

It’s been six months since my socks class. I’ve been slowly gaining a better appreciation of sock construction and reading my knitting. I’m not really that happy with my almost-finished pink sock. I’ve started 2 other socks (you can see my progress above) and when they’re long enough, I’m going back to my LYS (local yarn shop, for those of you who don’t read knitting blogs) for some remedial tutelage on the heel flap.  My LYS is Kiwi Knitting, a very friendly shop that supports beginners. The very helpful staff can talk  panicked, anxious knitters off the ledge and get them back to their projects in no time.  I recently paid $60 for a year long membership to their Kiwi Klub so I can attend Monday Knit Nights to help me be a better knitter.

Because of course I have nothing but an abundance of free time to fill with knitting.

As for my sock plan, I hope to knit the heel flap on one of the unfinished socks while at Kiwi Knitting, so I can get the instructions again in person.  This I want to do by the end of the month. Then I plan to go home and immediately knit the heel flap on the other sock. This way I may better remember how to do it, because it’s the only tricky part.  And then ultimately I’ll have to knit matching socks. Maybe by the end of the year I will have gotten the hang of basic sock knitting: that is a modest and possibly achievable goal.

Taking Shape….

This is a very vague mock up of some of the fabric I’ve put together for my new piece:

I really like the fabric on the bottom, here’s a close-up: I’m tired of cutting out contact paper shapes, that’s for sure.

I experimented a bit with pleating some yardage and dyeing just one side, to get some vertical shapes: here’s the pleated fabric and the tub of water for the partial dye-bath:

And here’s the fabric actually in the dye bath:

This is a nice technique to use to get vertical stripes, and it’s something I learned from a book by Claire Benn and Leslie Morgan. I had to do this four different times with four different colors to get the vertical striped fabric you see in first photo above.

Soon I’ll be able to sew all the fabric together for the quilt top. Very exciting!

Bread Baking and Paper Shredding

I started working on the collage fabric I’m making for my new quilt project about the January 8 shootings; above are ripped up photocopies of photographs I took of the memorials to the victims.

In between bouts of paper ripping I made a batch of bread with the stand-mixer I recently found on Craigslist for a steal.

I used this recipe I got from my mom:

place 1 cup whole oats and 1 cup polenta in a bowl, pour in hot water until grains just covered, allow to stand, then:

2Tbsp fresh yeast and a bit of sugar dissolved in 1/4 cup warm water; allow to stand in a warm spot for 20 minutes or until nice and bubbly, then add:

oat/corn mix, 1 Tbsp salt, 1/4 cup honey, 1/4 cup good quality olive or safflower oil, 1Tbsp lecithin dissolved in a small amount of water, mix:

then, slowly add 4 cups organic whole wheat flower, mixing with a dough-hook. Add up to 1/2 cup more flour if needed until dough in mixer is nice and smooth to the touch, not sticky, but still moist. I’d say 7 minutes for sure in the mixer once the flour is added. Then place dough in a large greased bowl, brush top of dough with oil, cover with a cloth and let raise in a warm place for an hour or until double. Punch down, divide, knead each piece a minute and shape into loaves and place in loaf pans, brush with oil, let raise for 45 minutes or until loaf-sized, almost, then bake for about 30 minutes at 350 degrees. This is what my bread looks like:

I was surprised how good it turned out. Very yummy.

Screen Printing Revisited

Finally, back to an art quilt project. I have this idea of a piece about the January 8th Shooting in Tucson.

I made print paste mix yesterday to get ready for screen printing, as it’s best for the mix to sit 24 hours before use; it’s just sodium alginate, water and some urea. I’ve read several recipes that call for 8 Tablespoons of sodium alginate per gallon of water (a whole gallon is made because it stores well in the fridge); however, this is what the paste looks like with those proportions:

Yep. Very runny for a paste that you’re supposed to actually drag across a silk screen. So I added sodium alginate, increasing my total number of Tablespoons to 11:

And while it thickened some more after this effort….it was still too thin. I’m going to add 14 Tablespoons next time and see if I actually get a paste.

I then cut out some stencils of human shadows; I had this idea of creating fabric of the silhouettes of a man, woman and child to represent the different people hurt and killed at the shooting:

I settled on the shapes of a girl and a man; although it’s not my intention, I think this creates a more sinister feeling, and ultimately this may be very good for the piece, given the subject matter.

Here are the freezer paper cut-outs ironed on to the back of a silk screen:

Here’s my “outdoor studio”: plywood on top of sawhorses makes for my work space, and the patio table is my work area. Check out the wildflowers in the background!

Here’s one run:

Unfortunately, the freezer paper stencils didn’t stay ironed-on to the silk screen; they remained in place for the first run, then started remaining stuck on the fabric midway through the second run due to the wet conditions and the thin print paste mix. I just carefully unpeeled the stencils and stuck them back on the fabric. Here’s what the fabric looked like, wet, after 4 runs. I seem to remember from past practice that the fabric really can only absorb the dye from 2 runs, possibly 3 but not much.

I should make it clear that I have poor screen printing technique, and that I do all kinds of short-cuts and chaotic things while I print:

Here’s the finished fabric; it’s pale (I used very old dye to see if it still worked, I used Procion MX cold water dyes I’d mixed 4 months ago and left in the fridge, just to see how they’d perform:

I think the shadow idea worked well; the shapes are distinct. I like the colors, too, but I think I’ll mix fresher dye next time:

Socked In

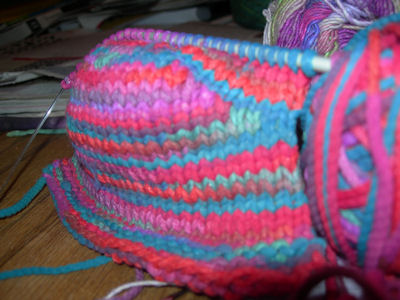
Well, it happened. I started knitting and spent ALL OF JANUARY on the above sock, which still isn’t finished and it’s February. I’ll finish the foot this week; I’d like to post a photo of it completely done in 48 hours. While I enjoy knitting, I miss making art. It’s been a while. Hopefully not much longer. The hiatus is painful, but the knitting is not. I hope the next sock goes faster! I’m using one circular needle for the sock, a technique also known as “magic loop knitting”.

Short Row Swatch

I really do not want this to turn into a knitting blog. I could just see it happening, though; because, once you start knitting it’s impossible to stop…and the only time you stop is to do something else knitting-related. If you have a slightly nervous or anxious temperament, knitting is a guaranteed downer activity for you.

I haven’t knit in years. I think the last time I had a project going was when my mom was in the hospital 3 1/2 years go; her recent stay (see last post, she went home yesterday) made me go through one of my many yarn boxes and find some needles and yarn. I thought I’d try and remember how to do short row shaping, and I made a little short-row swatch as a reminder-project while I was with my mom at the hospital:

Short rows are good for sock heels and shaping at the hips and bust of garments; I suppose the above shape is self-evident towards this end. There’s a great tank-top pattern and short-row tutorial here; I did have to check it one night to make sure I remembered how to do it.

I’m worried that I might start knitting socks or something. This could be dangerous.